Material & Edge Banding
This group determines what the carcass is built from and how its visible front edges are treated. It is also where you enable whether the carcass stands on the project plinth and carries a worktop.
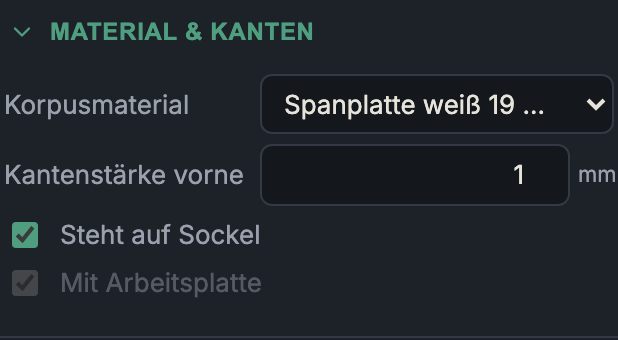
Carcass material
- What it does: Selects the sheet material for the carcass parts (sides, bottom, top panel, vertical dividers, shelves without their own material). The choice also sets the material thickness and the grain direction.
- When to use it: Always first — material drives thickness, appearance, cost and the grain logic during cutting.
- Pros & cons: You create materials in the material editor. A material with grain forces its parts into a fixed run direction when nesting (it cannot be rotated) — this costs a little sheet yield, but is mandatory for decors/real wood so the grain runs correctly.
The bundled catalogue includes, among others, white chipboard (16/19 mm), oak decor (19 mm, with grain), birch plywood (18 mm), raw MDF, HDF and chipboard back panels, as well as a worktop.
Front edge thickness
- What it does: Thickness of the edge banding on the visible front edges
of the carcass parts (range 0–3 mm, default 1 mm).
0turns the edge banding off. - When to use it: For sheet materials with an open edge (chipboard, plywood, MDF) that stays visible at the front and should be protected/finished.
- Pros & cons: The app factors the edge banding into the running metres of edging in the material list (for ordering). A thicker ABS edge (2 mm) is more impact-resistant, a thin one (0.4–1 mm) less noticeable. The edge thickness does not count geometrically towards the sheet thickness, but does appear in the "Edges" column of the parts list.
Stands on plinth
- What it does: Raises this carcass to the height of the project plinth.
- When to use it: For base cabinets that stand on a shared plinth.
- Pros & cons: The checkbox is only active when a plinth has been created in the project ("Enable in the project first"). This keeps the carcass setting consistent with the project. Individual carcasses (e.g. a wall cabinet set on top) can leave the plinth out.
With worktop
- What it does: Places a worktop on this carcass (on its respective top edge).
- When to use it: Work/cover tops over base cabinets.
- Pros & cons: Also gated — only usable once a worktop has been enabled in the project. You control overhangs and material centrally in the project, so that a continuous top spanning several carcasses stays uniform.
Next: Construction