Joinery
The Joinery group defines what adjacent carcass panels are joined with. It controls both the connectors listed in the hardware/machining list and — in the case of the groove — the actual geometry of the parts.
Joinery scope — when this group does (not) appear
The joinery method applies to butt joints. If the corners are already box-jointed (box joint/dovetail), they are geometrically interlocked — the joinery method does not touch them. It then applies only to:
- stretchers (when the top consists of stretchers) and
- the vertical divider (when the carcass is divided vertically).
The app responds accordingly:
- Box-jointed corners without stretchers and without a vertical divider → the whole group is hidden (there is nothing to butt-join).
- Box-jointed corners with stretchers and/or a vertical divider → a note states the limited scope ("The corners are box-jointed – the joinery method applies only to …").
This avoids the contradictory statement "dowel at a box-jointed corner".
Joinery method
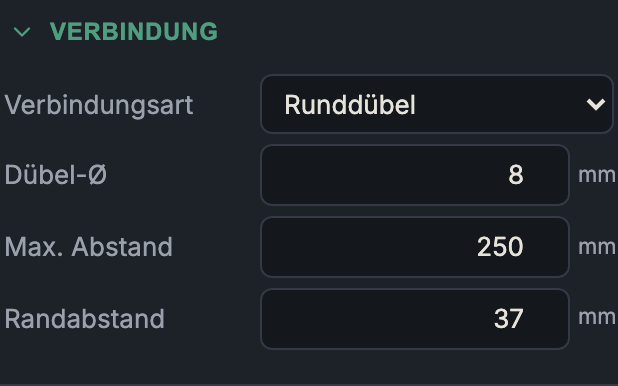
Dowel
- What it does: Wooden dowels in opposing holes. Additional field: dowel Ø (4–12 mm, default 8 mm).
- When to use it: The standard in panel furniture making — cheap, and fast with a dowel jig / line-boring machine.
- Pros & cons: Inexpensive and available everywhere; the dowels center and position the part (which is why at least two are set on short joints). Requires precise hole patterns on both sides.
Domino
- What it does: Loose-tenon/biscuit tenons of the Festool Domino system. Additional field: Domino size (4×20 … 10×50). The routing depth per side is half the tenon length.
- When to use it: Fast, very precise joint with defined alignment; popular in the professional workshop.
- Pros & cons: A very good combination of positioning and strength, fast to make — but requires the Domino router.
Biscuit
- What it does: Biscuits (flat dowels). Additional field: biscuit size (#0 / #10 / #20).
- When to use it: Aligning panel joints, miters, light frames.
- Pros & cons: Cheap and tolerant when aligning lengthwise; less tensile strength than dowels/Domino. Good for positioning, less so as a pure load-bearing element.
Screws
- What it does: Direct screwing of the panels.
- When to use it: Workshop/knockdown furniture, carcasses that should stay demountable, quick prototypes.
- Pros & cons: Fast, no special tools, immediately load-bearing; visible screw heads (unless concealed/plugged). In the end grain of chipboard, a screw holds worse than in the face.
Groove (Dado)
- What it does: The part being inserted sits in a groove (dado) in the receiving part. Additional field: groove depth (3 mm up to max. half the material thickness). This depth actually lengthens the grooved part — so the geometry changes, not just the hardware list.
- When to use it: A solid, self-positioning joint for bottoms/dividers; handles shear forces well.
- Pros & cons: Mechanically positive-locking and well aligned; weakens the receiving part by the groove depth (hence the limit to half the thickness). Requires clean groove routing.
Spacing (for dowel/Domino/biscuit/screws)
For all connectors except the groove, two fields appear:
- Max. spacing (32–600 mm, default 250 mm): the largest allowed distance between adjacent connectors along a joint. The app distributes the connectors evenly so that this spacing is not exceeded.
- End offset (10–150 mm, default 37 mm): how far the outermost connectors sit from the ends of the joint. The value 37 mm fits the System 32 grid.
The number of connectors follows from the joint length, max. spacing and end offset — it is shown in the hardware list.
Next: Back panel