Construction
The Construction group decides how the four carcass walls meet at the corners and what closes the carcass at the top. This is the most important fundamental structural decision — it determines the look, stability and which joinery method makes sense in the first place.
Construction
Who runs through at the corner, who butts in between?
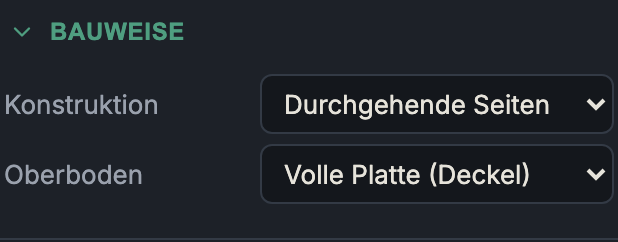
Sides-through
- What it does: The side walls run the full height; bottom and top panel sit between the sides.
- When to use it: The classic in carcass furniture — the default setting. The load stands on the through sides.
- Pros & cons: Very common, easy to join (dowel/Domino/ screw from the side into the end grain of bottom/top panel). The side edges are visible top and bottom.
Top-bottom-through
- What it does: Bottom and top panel run the full width; the sides sit in between.
- When to use it: When the top surface should run through visually (e.g. free-standing furniture, visible top) or the load stands on the bottom.
- Pros & cons: Attractive continuous top/bottom edge; but the end edges of bottom/top panel are visible at the sides.
Box joint (corners)
- What it does: Interlocking box joints at all four corners: sides and bottom/top panel run fully through and "comb" into one another.
- When to use it: A visible, mechanically very strong corner joint; classic for solid-wood carcasses, tool chests, high-quality drawer boxes.
- Pros & cons: Large glue area → very stable and decorative. Requires precise manufacturing (finger-joint jig/CNC). Here the finger width is a fixed grid across the whole carcass.
Dovetail (through)
- What it does: Through (open) dovetails at the corners (sides = tails, bottom/top panel = pins). Same full-panel arrangement as box joints, but the cells taper by the angle.
- When to use it: The supreme discipline of the visible corner joint — tensile in one direction (cannot be pulled apart without glue).
- Pros & cons: Highest strength and sense of quality, visible on both outer faces. The dovetail angle is adjustable (router-bit convention).
Dovetail (half-blind)
- What it does: Half-blind dovetails: on the outer faces of bottom/top panel the joint is concealed (blind sockets + a lap); the tails of the side are shortened accordingly.
- When to use it: The typical drawer-front joint (front without visible pins) and carcasses where no pins should be seen at the front.
- Pros & cons: Elegant, "hidden" joint — smooth on one side. More laborious to make. Note: With stretchers instead of a top panel there is no top panel to conceal against, so the side stays full at the top here.
Important on joints with pins: If the corners are jointed (box joint/ dovetail), they are geometrically "combed" and need no separate joinery method any more. The joinery-method selection then only applies to stretchers and a possible vertical divider — the app shows a corresponding note or hides the group entirely.
Finger width / dovetail angle
- Finger width (6–60 mm): the grid of the fingers/pins on jointed
corners. Appears only with
box-joint/dovetail/halfblind. A fixed grid ensures all four corners look the same (partial cells fall at the ends). - Dovetail angle (5–20°, default 8°): only with dovetails. Measured as a dovetail router bit is sold; ~8° is a good all-rounder, 7°/7.5° for hardwood (≈1:8), 14° for the large bits.
Top
What closes the carcass at the top?
Full panel (top panel)
- What it does: A full-surface top panel (default).
- When to use it: Anywhere a closed surface is needed at the top (wall units, visible surfaces, a stiffening top panel).
- Pros & cons: Maximally stiff against racking, closed look; but needs the full panel area.
Flat stretchers (front + back)
- What it does: Two flat-lying frame rails (stretchers) at front and back, flush with the top edge.
- When to use it: Base units under a worktop — the worktop needs no top panel, only a fixing surface.
- Pros & cons: Saves material and weight, gives a screwing surface for the worktop. Open at the top (no dust protection). The stretcher width is the depth of each flat rail.
Upright stretchers (front + back)
- What it does: Two upright stretchers at front and back.
- When to use it: Wide carcasses that should be stiffened against racking.
- Pros & cons: Considerably stiffer than flat stretchers for the same
material use. But: an upright front stretcher projects into the
front opening (by
stretcher width − material thickness) — drawers, doors and shelves must stay below it. The app accounts for this narrowing automatically in the drawer heights.
Stretcher width
Appears as soon as anything other than "Full panel" is chosen (40–200 mm). With flat stretchers = depth of the rail, with upright stretchers = their height (and thus the amount by which the front stretcher hangs into the opening).
Next: Joinery